
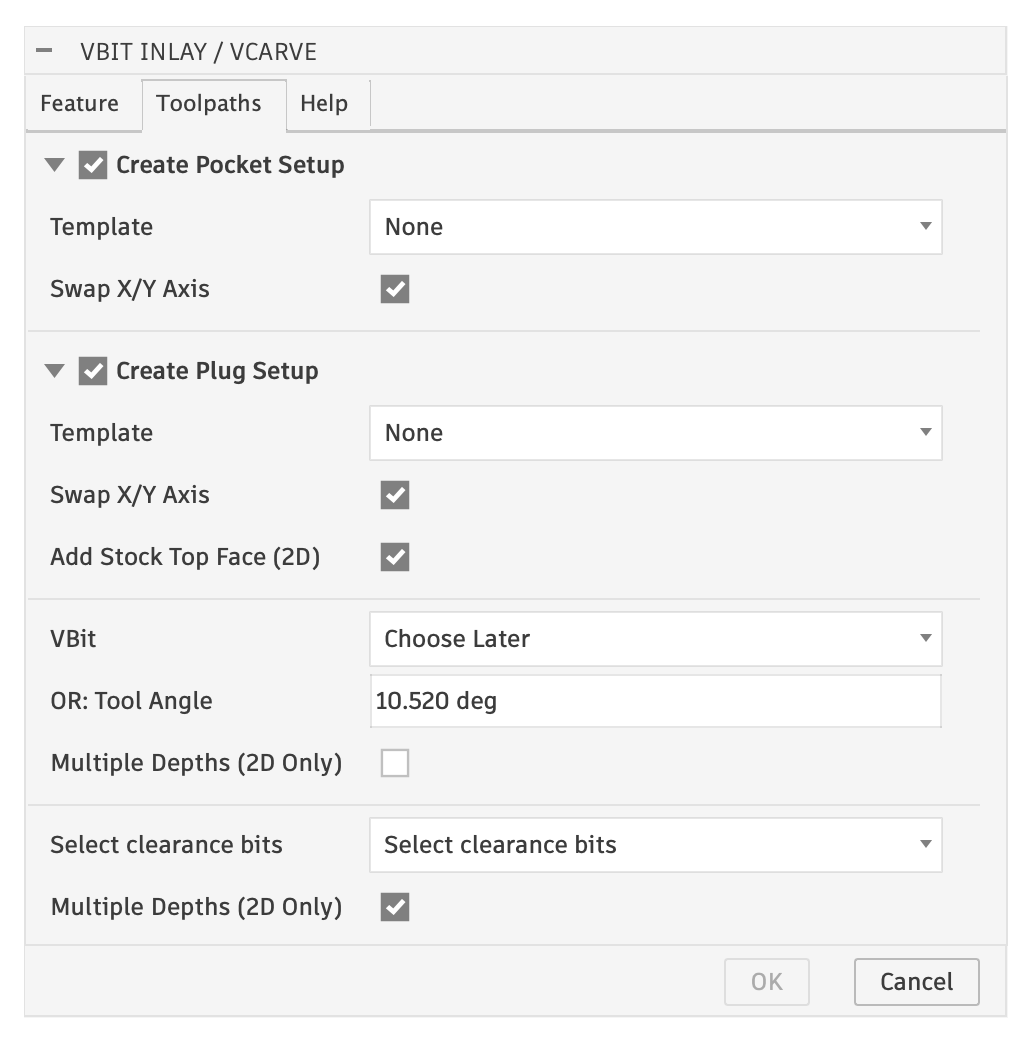
Create Pocket Setup & Create Plug Setup
If checked, the plugin will generate a Manufacturing Setup for the selected options, and pre-populate the correct toolpaths to machine it. The toolpaths will vary depending on if you targeted a Planar Face (2D) or a Solid Body (3D).Template
By default, the plugin will generate toolpaths based on the selected VBit and Clearance Bits. Instead, you can use a template of your own toolpaths, and the plugin will modify only the machining boundaries based on the Sketch vector design. Using a template will disable all the other options. See Templates for more information.Swap X/Y Axis
By default the setup will have the X/Y/Z origin be the bottom front left of the workpiece and match the orientation of the design. Checking this box will swap the x and y axis in the Setup, as I like to mount long pieces along my y-axis, and cutting boards are usually long in the x-axis. It does it by setting the X-axis to the y-axis in the Setup’s WCS.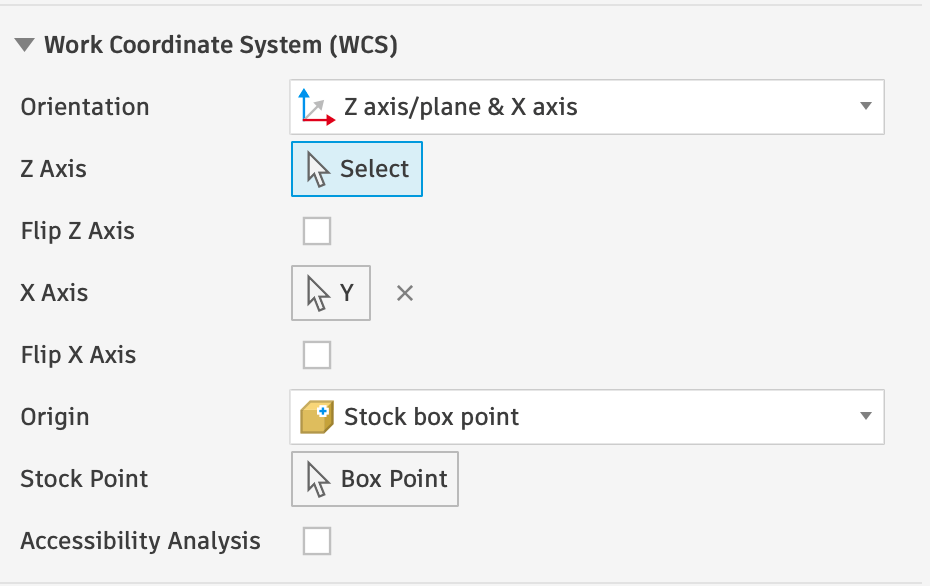
A Setup with the X and Y Axis Swapped
Add Stock Top Face (2D)
For plugs, it is good to face the stock top, and this will add a toolpath to do that, limited to the plug’s profile. It uses the largest clearance bit for the surface op, which you can later change.Add Profile Cutout (2D)

VBit Selection
The drop down list will show acceptable v-bits and flat bits that are currently in your document.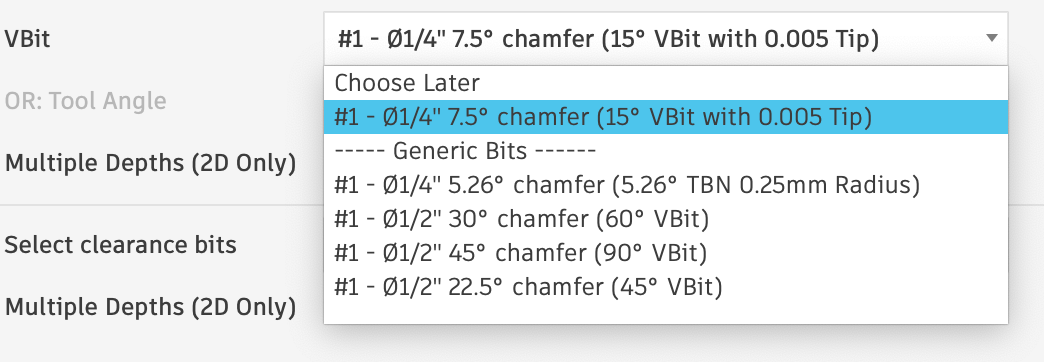
The VBit dropdown
Tool Angle
If you don’t select a bit, you must set the tool angle, which assigns the parameterinlay_bit_angle. This is used for all the math, and must be set correctly! See VBit Selection and Parameters for more information
Multiple Depths
If checked, the toolpath generation will check the Multiple Depths option in the toolpath, and set the depth to the bit diameter.Clearance Bits
You can select as many clearance bits as you want, and they will be used from largest to smallest, and finally the VBit will be used to clear any area that the prior bits couldn’t get to. Some Generic bits will show up by default, and you can later choose the actual bits you want to use. The diameter is important for 2D toolpaths when using multiple clearance bits, which will be discussed later. For 3D, it is all done via “Rest Machining”, based on the prior operations.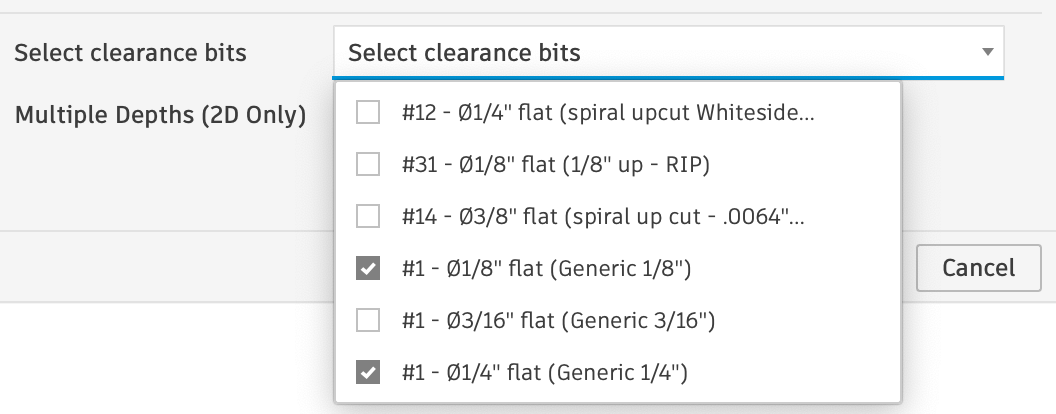
Clearance Bits
Toolpath Errors
If you did not pre-select tools, the toolpaths created by the plugin will show up with a red exclamation point and be invalid. If this is the case, you can double click on an operation and manually select the correct tool you want to use. Ensure the tool’s bit angle matches the inlay_bit_angle Parameter. Otherwise, some machining offsets will be incorrect and your inlay will not fit. You can always change the parameter to match the bit you select.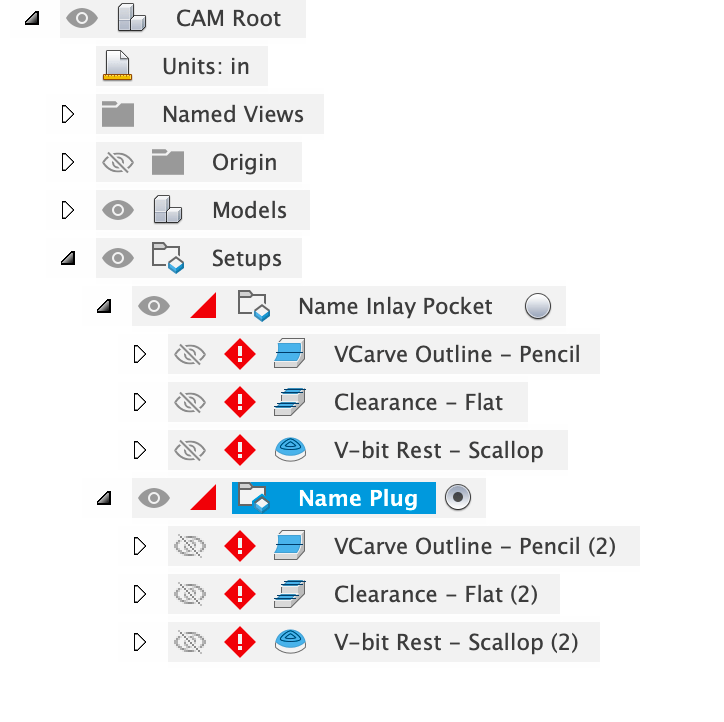
Red Exclamation Point: No Tool Set
Need help? Join Corbin’s Facebook group CNC Woodworking or email corbin@corbinsworkshop.com