
Setup
The plugin will (optionally) generate a pocket setup and toolpaths. The Pocket Setup has the following customizations:- The WCS Origin is set to “Stock Box Point”, and the Stock Point is pre-selected to be the “Front Bottom Left” corner. This means the Z-zero is the bottom of the project, ie: the spoilboard. You can change this if you like.
Optional: If you checked “Swap X/Y Axis”, the setup will look like the second picture.
- The Stock is set to “From solid” and the original Target Body is selected. For basic planar “2D” inlays, you can set it to “Relative Size Box” and change it to your liking.
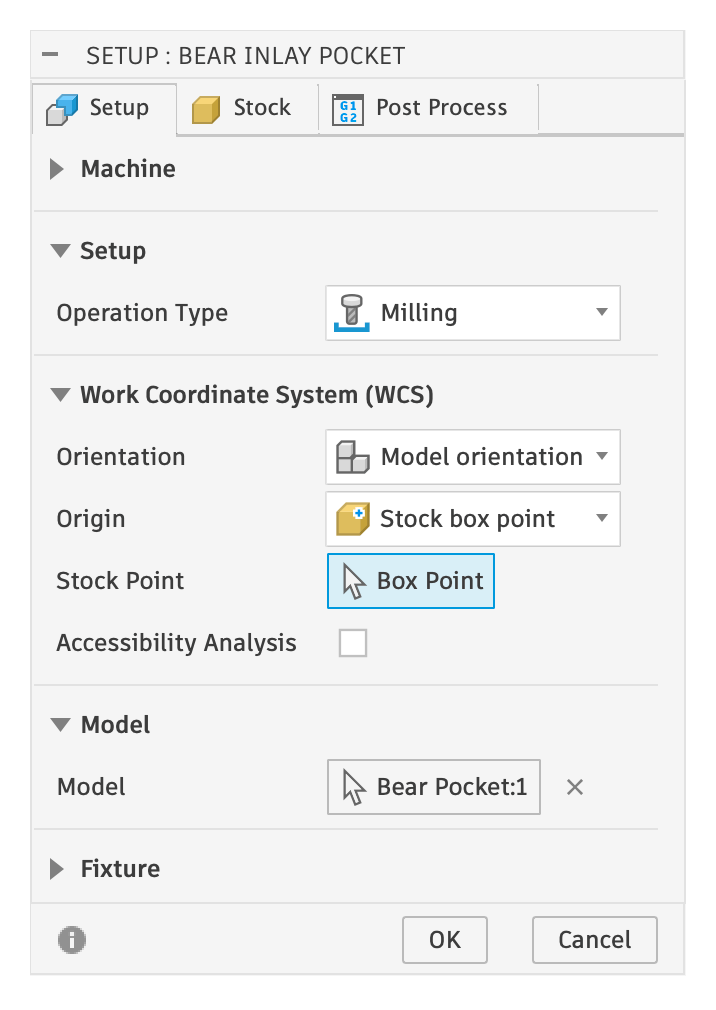
Setup Tab - Default
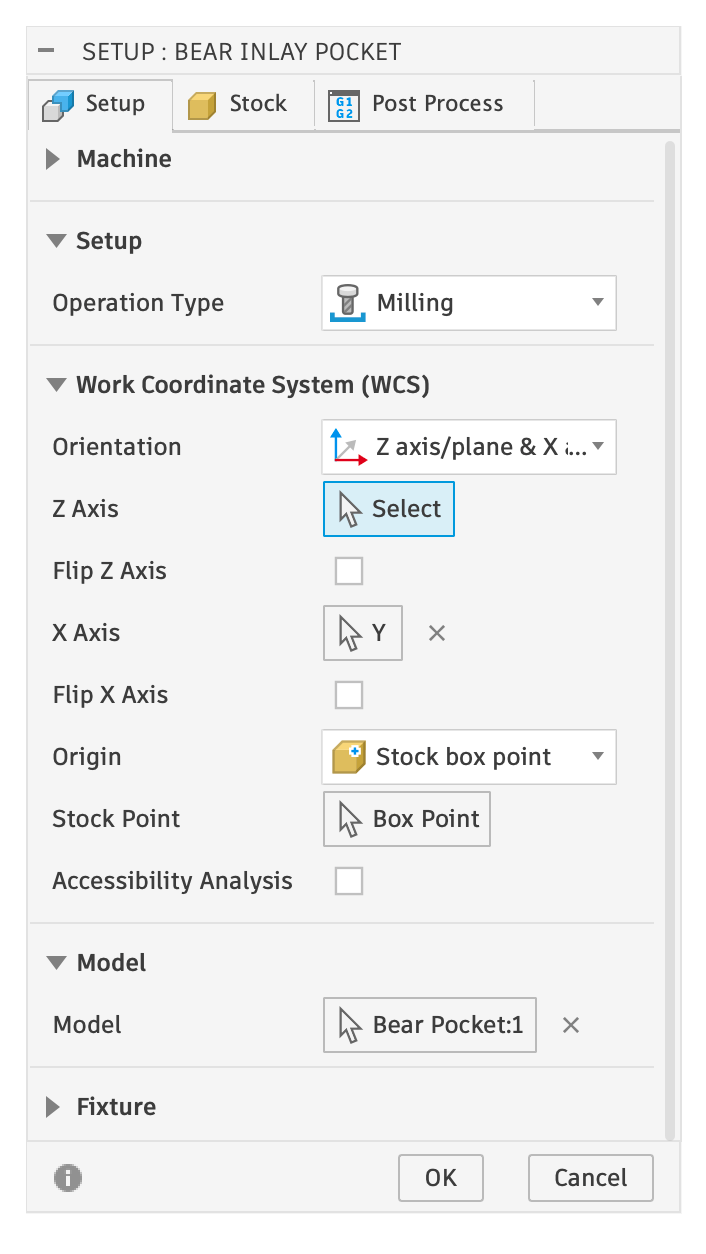
Setup Tab - Swapped X/Y
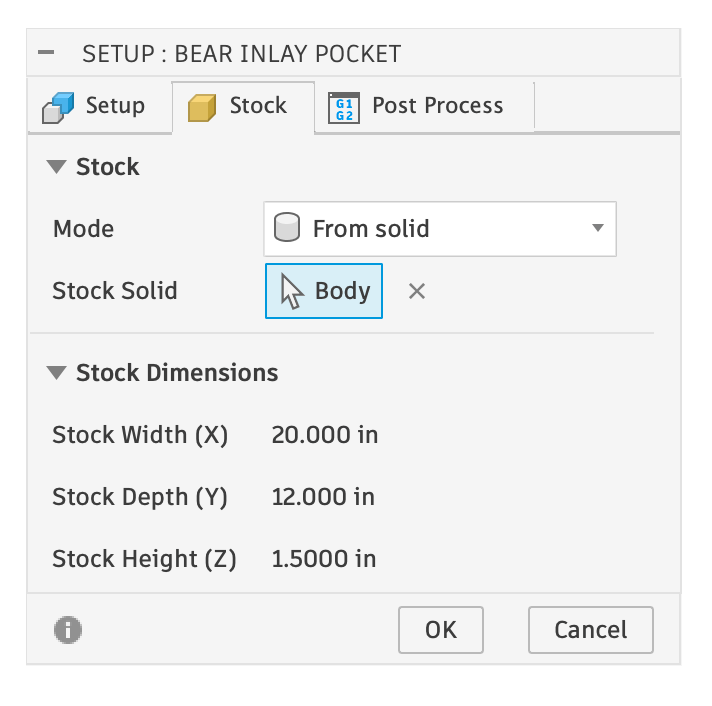
Stock Tab
Toolpaths
The pocket has the following toolpaths automatically generated: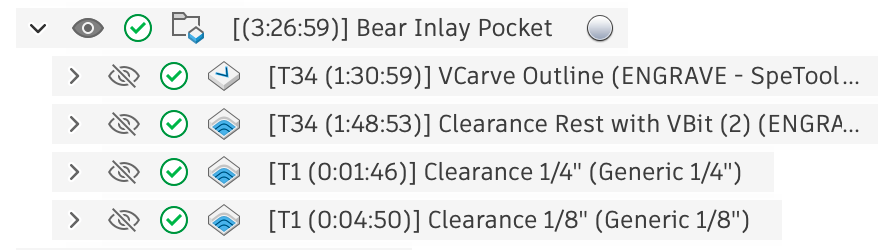
1. VCarve Outline
A 2D Engrave toolpath in Autodesk Fusion. Engrave will only follow closed profiles. The Sketch Profile is set to a single Sketch: the Design sketch that was created in the “Name Pocket” based on the selected vector design. It is also set with a Side of “Start Inside”, which is important! Double click on the list item to see these details: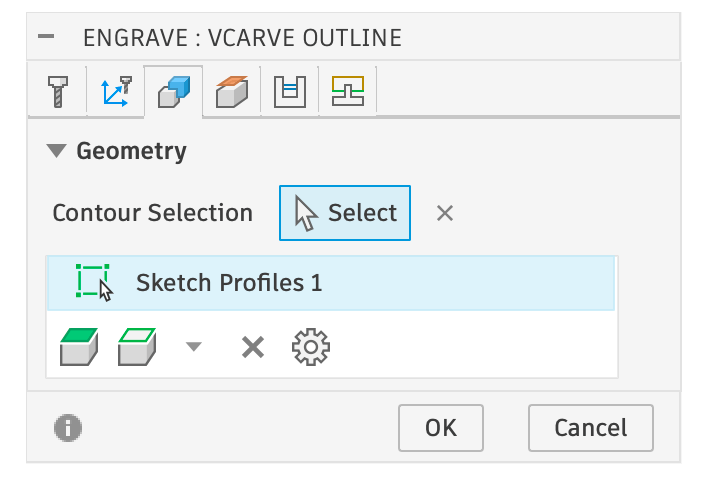
On the Geometry tab, the Contour Selection is set to Sketch Profiles.
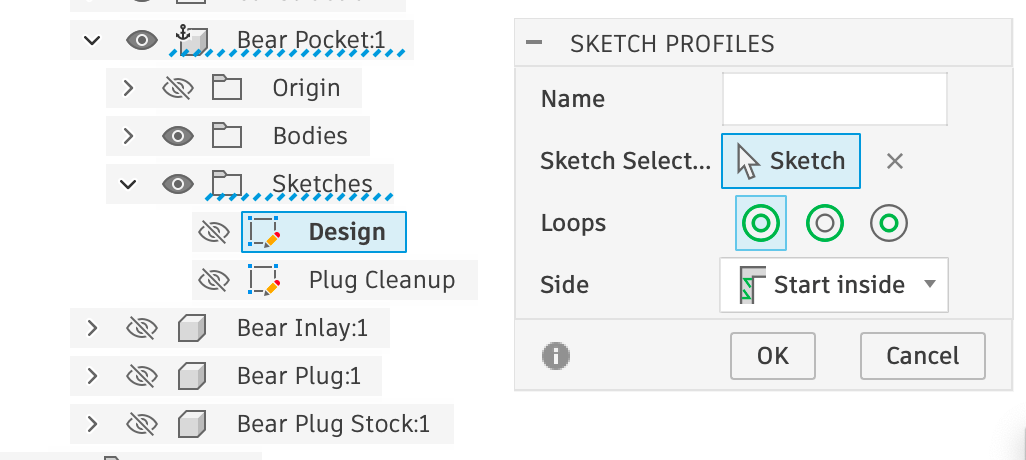
Showing the selected Sketch in the Browser
-inlay_depth a Parameter which can be customized at anytime.
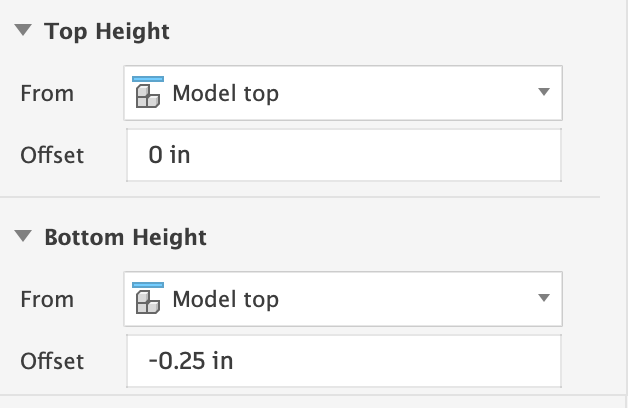
Heights Tab
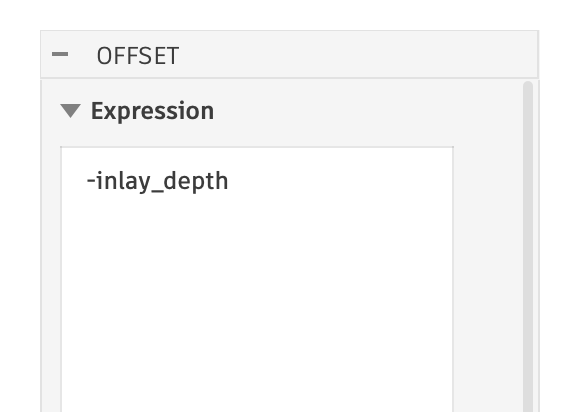
Bottom Height Expression
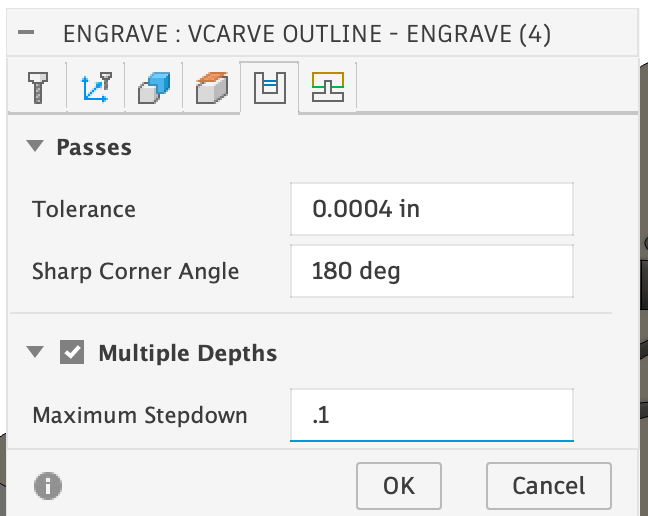
Passes and Sharp Angle Settings
2. Clearance Rest with VBit
The second toolpath with a vbit is ordered second to minimize tool changes, but it is the toolpath that will cleanup anything that the next clearance bit toolpaths could not get to. Explaining the next toolpaths first makes more sense, and then I’ll come back to this one.3. Clearance 1/4” (Largest diameter first)
A basic 2D pocket that that uses the selected flat end mill to do clearance. The Sketch Profiles and Heights are set exactly like 1. VCarve Outline The most important part is the Stock to Leave on the Passes Tab. The “Radial Stock to Leave” is set to what appears to be a specific value (0.0329131 in). This is an expression. You can click the three dots to the right of the Value Input and select Edit Expression.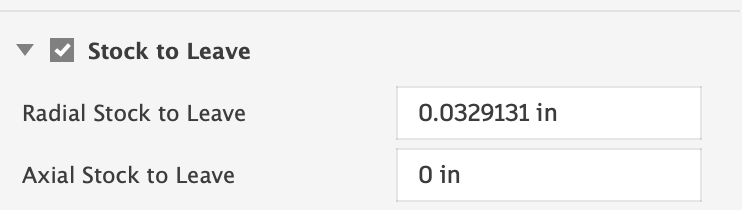
Radial Stock to Leave on the Passes Tab
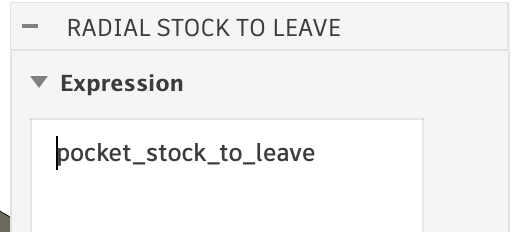
Stock to Leave Radial Expression
pocket_stock_to_leave. If you look at the Parameter, you will see its value is set to: tan(inlay_bit_angle / 2.0) * inlay_depth – this is some basic math that keeps the clearance operation away from the edges of the inlay by the exact amount that the v-bit leaves behind. This one of the main tricks for VCarving Pockets with a clearance bit.
Things you can and potentially should change: Multiple Depths, and Ramp
4. Clearance 1/8” (& smaller diameters)
Subsequent toolpaths are setup exactly like the above toolpath, with one exception: on the Geometry Tab Rest Machining is turned on, and the Tool Diameter is set to a specific value (shown here as 0.2960 in).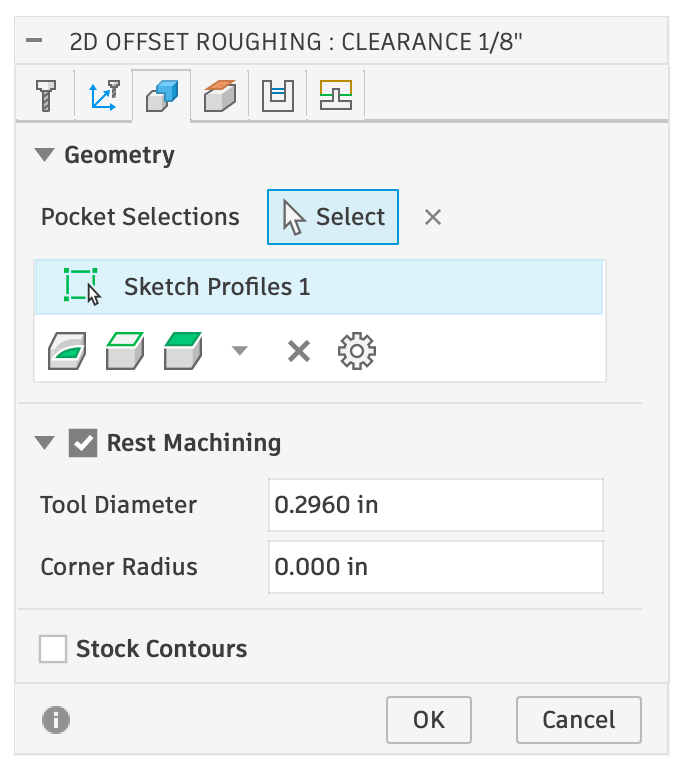
Rest Machining turned on with the Tool Diameter set
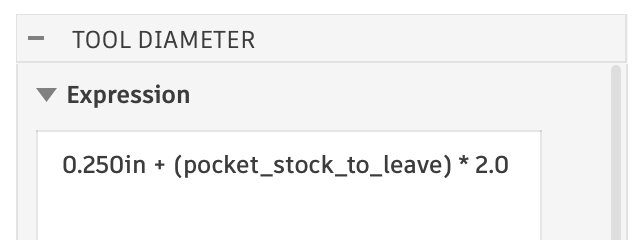
Tool Diameter Expression
0.250 in + pocket_stock_to_leave * 2.0 — this special value is what makes the 2D Pocket attempt to get the area that the previous larger bit could not fit into.
The expression is very specific: it takes the previous bit’s diameter, 0.250 in in this case, and adds in pocket_stock_to_leave * 2.0 — the amount that the v-bit needs to leave by the engraving toolpath cut in 1. VCarve Outline
For multiple clearance bits, each bit will have the previously larger bits diameter set in it’s expression.
So back to 2. Clearance Rest with VBit - it it setup in exactly the same way, and it gets all the areas that the previous bit diameters could not reach.
Toolpath Order
For 2D inlays, the order of the toolpaths is somewhat important, as Rest Machining assumes the previous bit cleared that area, and may drag the next toolpath bit across it, potentially causing a collision. This can ben an issue for the 2. Clearance Rest with VBit, if you run it first, but practice this isn’t too big a deal. You can also reorder the toolpaths however you want because they are not dependent on any prior information (it is all contained in the toolpath). It might make more sense to do the clearnace operations before the v-bit operations. Some people prefer to do this.Need help? Join Corbin’s Facebook group CNC Woodworking or email corbin@corbinsworkshop.com